
AI Buddy
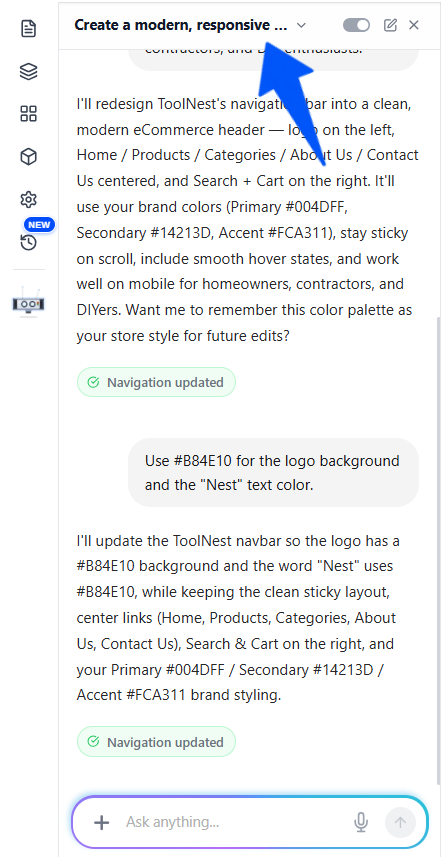
AI Buddy is the AI assistant built into the Builder. Instead of editing everything by hand, you tell Buddy what you want in plain language and it makes the change for you, generating pages, updating content, and wiring things together across your store.
Open it from the robot icon in the Builder's left menu.
Making changes with a prompt
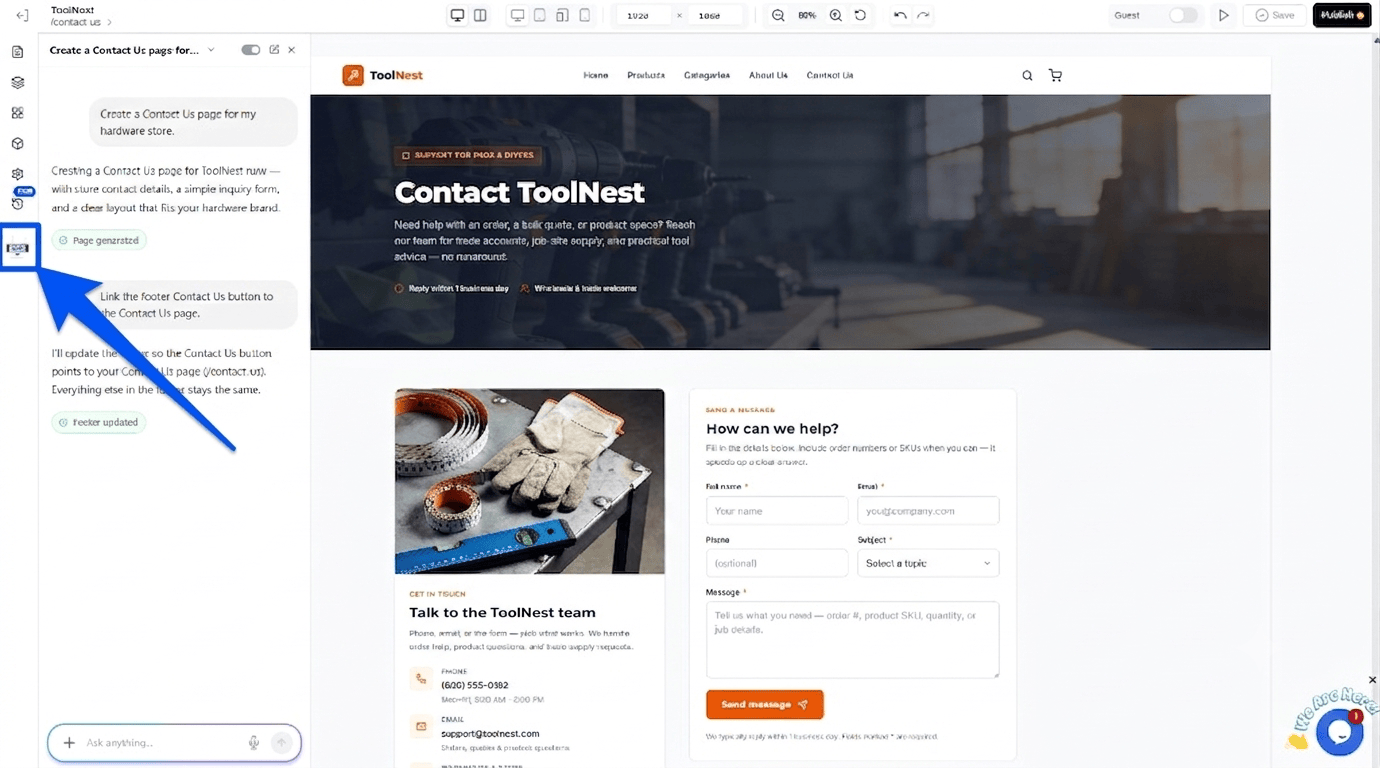
Type what you want in the Ask anything… box and send it. Buddy interprets your request, applies the change, and confirms when it's done.
For example:
Ask Buddy to create a page
Prompt: "Create a Contact Us page for my hardware store." Buddy generates the page, with store contact details, an inquiry form, and a layout that fits your brand, and confirms with Page generated.
Ask Buddy to connect it up
Prompt: "Link the footer Contact Us button to the Contact Us page." Buddy
updates the footer so the button points to /contact-us, leaves everything else
untouched, and confirms with Footer updated.
Targeting an element
Prefer to follow along in a video? This short clip walks through targeting an element, then read the guide below.
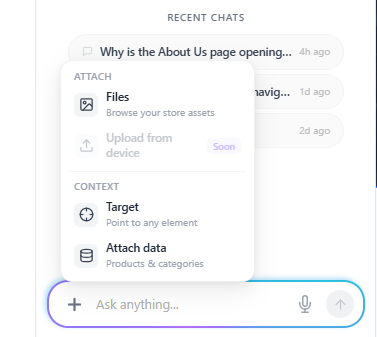
Instead of describing which part of the page you mean, you can point Buddy straight at it. Click the + icon in the chat's Ask anything… box to open the attach menu:
- Attach, Files (browse your store assets) and Upload from device (coming soon).
- Context, Target (point to any element) and Attach data (products & categories).
Choose Target
Click +, then select Target.
Click the element
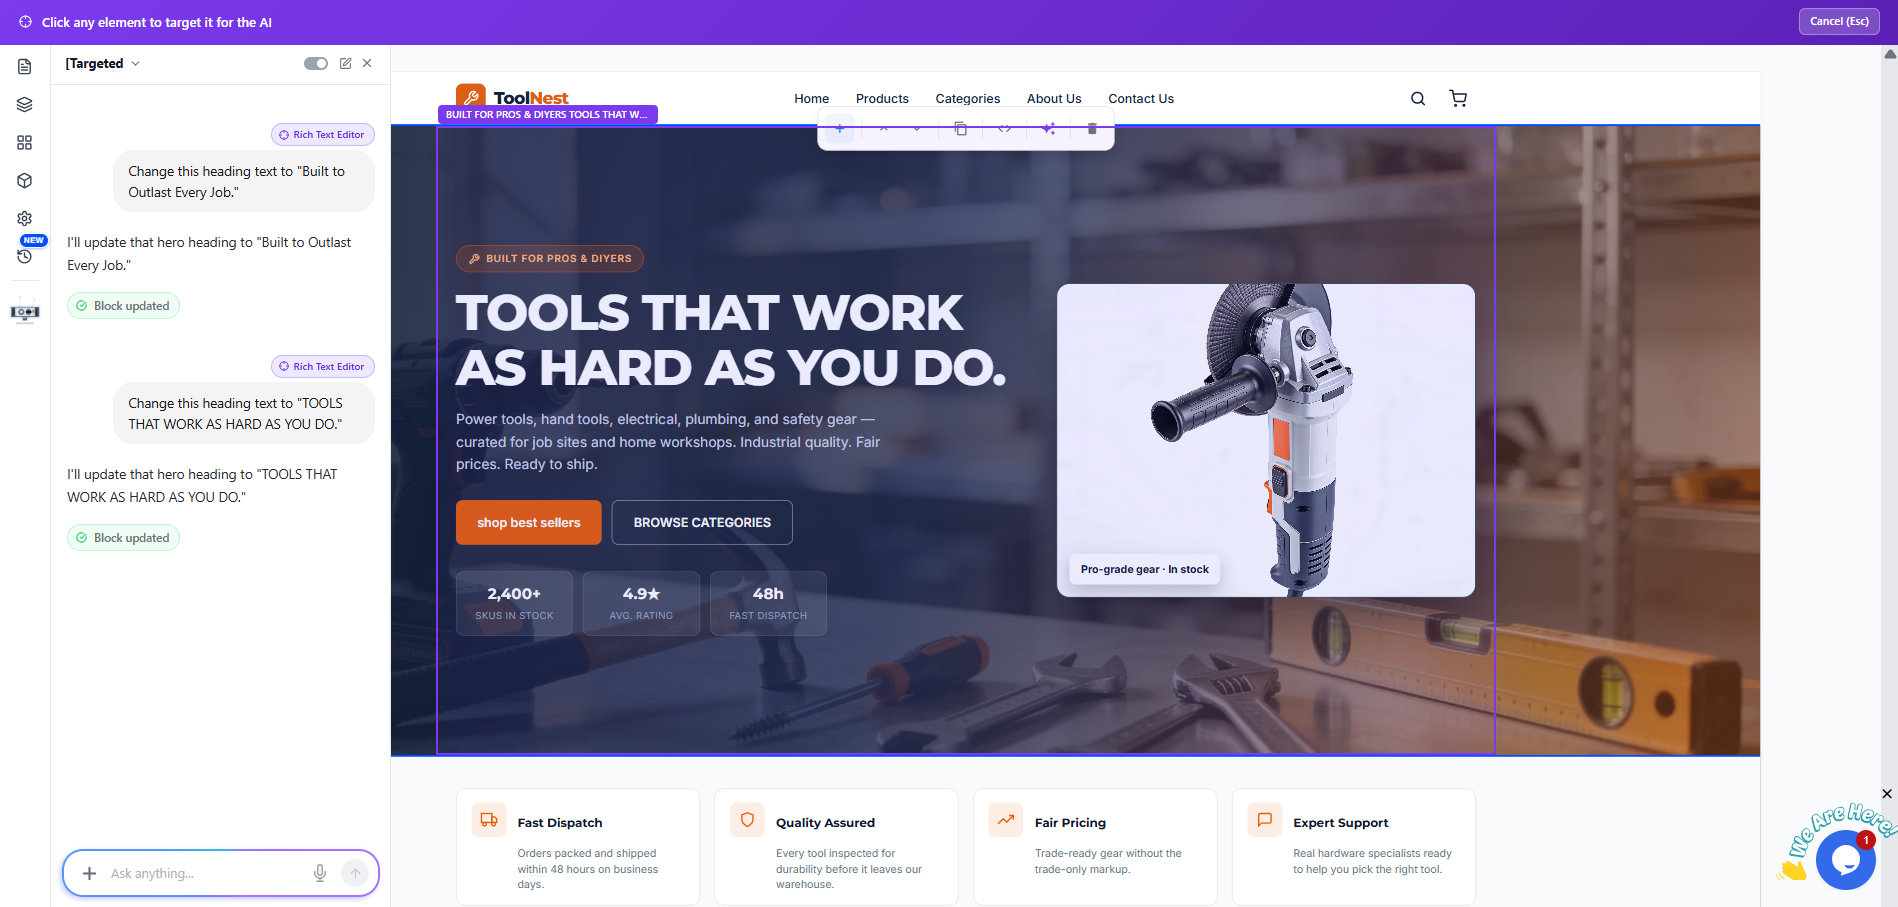
Click any element or section on your store. That element is now targeted for
your next change, and it appears as a chip above the Ask anything… box.
The chip shows the element type and tag, for example Rich Text Editor · <h1>
for a heading.
Changed your mind? Press Esc to cancel target mode without selecting anything.
Describe the change
Type what you want done to the targeted element. Buddy applies the change to the targeted element only, then confirms with Block updated.
For example, with a hero heading targeted:
- You: "Change this heading text to 'Built to Outlast Every Job.'"
- Buddy: "I'll update that hero heading to 'Built to Outlast Every Job.'", then shows Block updated.
Attaching a data source
Some elements show their content from your store's backend data, for example a product grid or a category grid. For these, you can change which data they pull from without regenerating the block.
Open Attach data
Click the + icon, then choose Attach data (products & categories).
Pick a catalog
A Search catalogs dropdown opens. Search and select the catalog you want, for example Pro Essentials or Shop By Category.
The data source is applied
The targeted element now shows a Data source dropdown (for example Category Grid by Catalog (AI) · Shop By Category). The change is applied instantly, with no regeneration, and you can switch the source any time.
Adding images
You can attach images to the chat so Buddy uses them in your store. Click the + icon, choose Files, and the Select image window opens.
In the Select image window you can:
- Pick an existing image. Browse your store assets and tick the images you want. Use the All / Category / Product / Theme filters to narrow the list.
- Add image. Click Add image (or drag and drop) to upload an image from your device.
- Generate with AI. Let Buddy create a brand-new image for you.
When you're done, click Done to attach the selected images (or Cancel to go back).
Generating an image with AI
Click Generate with AI to create an image from a description:
Choose an aspect ratio
Pick the shape that fits where the image will go, 1:1, 16:9, 9:16, 4:3, or 3:4.
Describe the image
Type what you want in the Describe the image… box (or use the microphone to dictate it), then send it. Buddy generates the image for you to use.
Memory
By default, AI Buddy remembers your previous conversations so it understands the context of your store and builds on earlier requests.
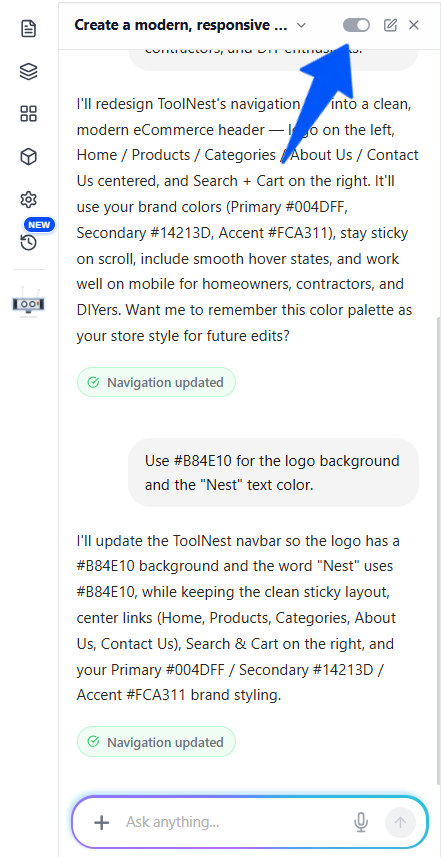
Use the memory toggle at the top of the chat to turn memory on or off:
- Toggle ON (default). Buddy uses this conversation as context in its memory, so it can build on what was said in future chats.
- Toggle OFF. Buddy does not remember this chat's context. The conversation is still saved to your history, Buddy just won't use it as context for future suggestions.
Private Chat
Private Chat is the same idea as turning memory off. In a private chat, the conversation is still saved to your history, but Buddy does not remember its context. A banner, "Private chat, I won't save or use your memory.", confirms you're in private mode.
Use Private Chat when you want to try something out or ask a one-off question without Buddy remembering it as context for future suggestions.
Conversation history
You can access and review your past conversations with AI Buddy at any time, so you can revisit what you asked and what changes were made.
From your history you can:
- Search. Find a past conversation quickly by searching for it.
- Check. Open any past conversation to review what you asked and what Buddy changed.
- Delete. Remove a conversation from your history when you no longer need it.